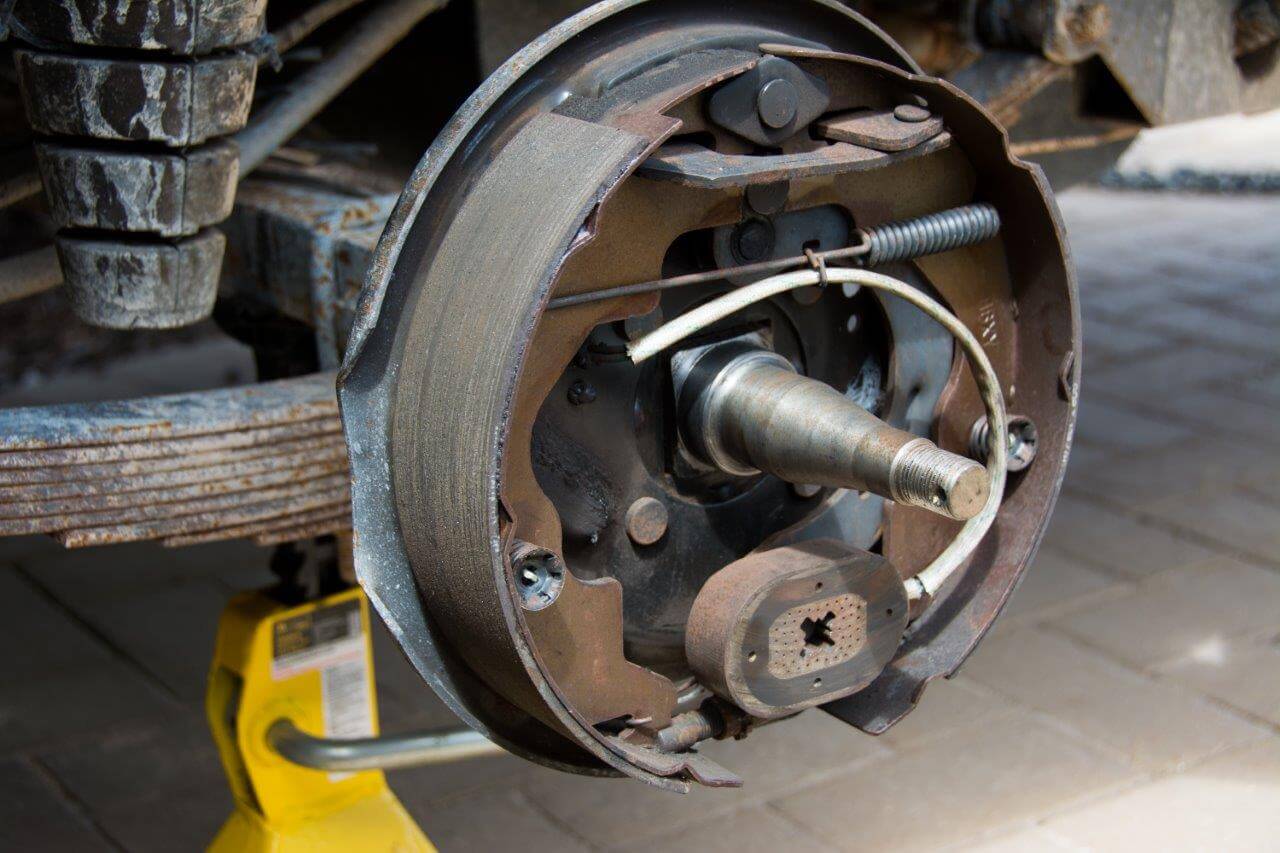
how to adjust electric brakes on trailer
When it comes to maintaining and adjusting your trailer brakes, it's essential to have the right knowledge and tools at your disposal. In this article, we will provide you with step-by-step instructions on how to adjust self-adjusting electric trailer brakes and drum brakes on a trailer. These brakes play a crucial role in ensuring the safety and smooth operation of your trailer, so taking the time to properly adjust them is highly recommended.
Adjusting Self-Adjusting Electric Trailer Brakes
Self-adjusting electric trailer brakes are designed to constantly monitor and adjust themselves during operation, ensuring that they maintain optimal performance. However, periodic manual adjustment may still be necessary to fine-tune the brakes. Here's a guide on how to do it:
Step 1: Safety First
Before starting any maintenance or adjustment work, always prioritize safety. Make sure the trailer is on a level surface and securely supported with jack stands. Chock the wheels to prevent any accidental movement.
Step 2: Removing the Wheel
Using a lug wrench, loosen the lug nuts on the wheel you want to work on. Once loose, elevate the trailer with a jack, remove the lug nuts, and carefully take off the wheel.
Step 3: Accessing the Brake Assembly
With the wheel removed, you'll have clear access to the brake assembly. Locate the adjusting hole or slot on the brake backing plate, which is usually covered by a rubber plug.

Pic: Self-Adjusting Electric Trailer Brakes
Step 4: Adjusting the Brake Shoes
Insert a brake adjustment tool or a flathead screwdriver into the adjusting hole or slot. Rotate the tool in a direction that tightens the brake shoes against the drum. Turn the tool clockwise to increase the tension on the shoes.
Rotate the tool until you feel a slight drag when rotating the wheel hub. This indicates that the brake shoes are making proper contact with the drum. Repeat this process for each brake assembly on the trailer.
Step 5: Reinstalling the Wheel
Once you have finished adjusting the brake shoes, it's time to reinstall the wheel. Place the wheel back onto the hub, align the lug nut holes, and hand-tighten the lug nuts as much as possible.
Lower the trailer off the jack stands and onto the ground. Use a torque wrench to properly tighten the lug nuts according to the manufacturer's specifications.
Repeat this entire process for each wheel on your trailer to ensure all self-adjusting electric brakes are properly adjusted.
Adjusting Drum Brakes on a Trailer
If your trailer is equipped with drum brakes, regular adjustment is necessary to maintain optimal braking performance. Follow these steps to adjust drum brakes on a trailer:
Step 1: Safety Measures
As always, prioritize safety by ensuring your trailer is on a level surface and securely supported with jack stands. Chock the wheels to prevent any unintended movement during the adjustment process.
Step 2: Removing the Wheel
Using a lug wrench, loosen the lug nuts on the wheel you intend to work on. Elevate the trailer with a jack, remove the lug nuts, and carefully take off the wheel.
Step 3: Locating the Adjusting Wheel
Once the wheel is removed, locate the adjusting wheel at the bottom of the brake backing plate. It can typically be accessed through a small rubber plug or window.

Pic: Adjusting Drum Brakes on a Trailer
Step 4: Adjusting the Brake Shoes
Insert a brake adjusting tool or a flathead screwdriver into the adjusting hole and turn it in a direction that expands the brake shoes against the drum. Proceed with small adjustments, turning the tool a little at a time.
Rotate the adjuster until you feel a slight drag when spinning the wheel hub. This indicates that the brake shoes are making proper contact with the drum. Repeat this process for every brake assembly on the trailer.
Step 5: Reinstalling the Wheel
Once you finish adjusting the drum brakes, reattach the wheel. Place it back onto the hub, align the lug nut holes, and hand-tighten the lug nuts as much as possible.
Lower the trailer off the jack stands and onto the ground. Finally, use a torque wrench to securely tighten the lug nuts according to the manufacturer's specifications.
Repeat these steps for each wheel to ensure all drum brakes on your trailer are properly adjusted.
Regularly checking and adjusting your trailer brakes is crucial for maintaining their performance and ensuring your safety on the road. By following these step-by-step instructions, you can confidently adjust your self-adjusting electric trailer brakes or drum brakes on your trailer, promoting smooth braking and secure towing experiences.

